
Read the previous blog for how to create a XAML based page in Xamarin.Forms and Details on Xamarin.Forms XAML
So lets create a login kind of UI with the help of XAML in Xamarin.Forms
For a simple login UI we would need two text entry boxes and a button also one of the text entry boxes should be of password type Xamarin.Forms has a layout known as StackLayout which works somewhat similar to a StackPanel in windows or a LinearLayout in Android
Stack layout basically orders it children in a linear fashion – in a line horizontally or vertically by default it also adds spacing between its children of 6px lets use this to vertically align our UI Controls
<?xml version="1.0" encoding="utf-8" ?>

<ContentPage xmlns="http://xamarin.com/schemas/2014/forms"

xmlns:x="http://schemas.microsoft.com/winfx/2009/xaml"

x:Class="Blogsapp.MySampXamlPage"

BackgroundColor="Gray"

>

<ContentPage.Content>

<StackLayout Spacing="20" Padding="20"

VerticalOptions="Center">

 <Entry Placeholder="Username"/>

 <Entry Placeholder="Password"

IsPassword="true"/>

 <Button Text="Login" TextColor="White"

BackgroundColor="Blue"/>

 </StackLayout>

</ContentPage.Content>

</ContentPage>
lets run this and see what it makes
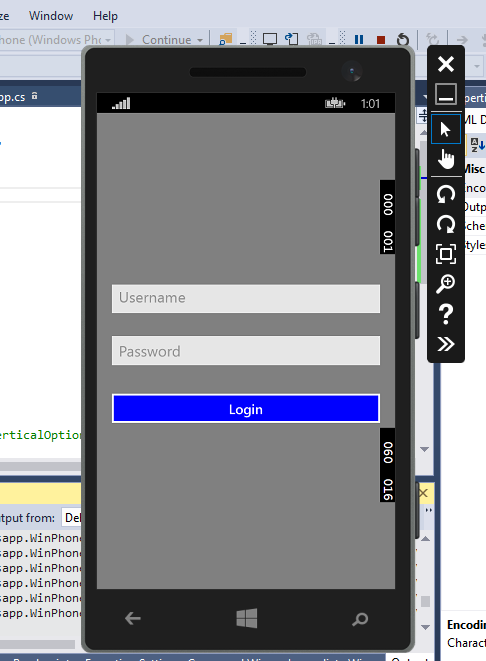
Hmm… That looks good let’s see what all we have used here
So we have a content page which has a gray background then we have something <ContentPage.Content> the stack layout we discussed earlier with spacing and padding also a vertical options set as center two entries and a button also we have set the IsPassword to true
let’s remove ContentPage.Content and run still I gives the same output let’s see why it’s so and other XAML details here or jump and wire up these so we can interact and make it do some actual work here

3 thoughts on “Creating a login UI with Xamarin Forms using XAML”